At Eminence Organic Skin Care, we’ve always known that nourishing your skin starts with the seed. Eminence Organics has prided itself on practicing green initiatives that reduce the company’s carbon footprint since its inception in 1958, long before the word “organic” became commonplace. You may be familiar with our commitment to using natural, organic ingredients, but we’ve also always used regenerative farming to cultivate a richer, healthier earth. Regenerative agriculture is a promising approach that focuses on enhancing and sustaining the farm’s entire ecosystem, particularly soil health. Join us in exploring why we are at the forefront of this eco-friendly movement.
What Is Regenerative Farming?
While regenerative farming has only recently gained widespread attention, it has deep historical roots. This method incorporates techniques such as rotating crops, applying natural compost, and supporting a varied ecosystem. It’s a way of farming that cares for the Earth just as much as it cares for the crops it produces.
While regenerative farming nourishes the earth and promotes healthy crop growth, it also addresses a broader environmental challenge: The critical task of reducing its carbon footprint. The agricultural sector, including forestry and other land use, accounts for nearly 25% of all human-made greenhouse gas emissions, with CO2 being the primary contributor to climate change. However, agriculture is also positioned to help resolve this crisis by creating a sustainable, carbon pollution-free future. This might seem contradictory, but as the Intergovernmental Panel on Climate Change explains, utilizing agriculture’s mitigation potential is essential for emission reduction. A promising approach is regenerative agriculture, which focuses on improving and sustaining the farm’s entire ecosystem, particularly soil health.
Regenerative farming, though recently gaining widespread attention, has deep historical roots. Traditionally, farmers instinctively used methods that honored and preserved the earth’s natural balance. This approach lost prominence with the Industrial Revolution, which modernized agriculture but at the cost of environmental health. Now there’s been a resurgence in regenerative farming, highlighting its increasing relevance and necessity in contemporary agriculture. Let’s examine the key differences between regenerative farming, known for its use of natural fertilizers and soil-enriching compost, and the methods used in conventional farming.
Regenerative Farming Vs. Conventional Farming
In the world of farming, traditional, regenerative techniques are making a major resurgence. So, what’s the difference?
Regenerative farming:
Incorporates natural and organic fertilizers
Includes compost, which fortifies soil
Implements gentle tilling when necessary
Maintains weed cover
Uses crop rotation
Champions biodiversity
Conventional Farming:
Relies on synthetic pesticides and fertilizers
Rarely includes compost
Requires/ Uses frequent tilling
Removes weeds
Uses monoculture or polyculture
Focuses on high-crop yield
Our Regenerative Farming Mission
From the beginning, the Eminence Certified Organic Farm, nestled between the Danube and Tisza rivers, has been committed to regenerative farming. Our farmers practice crop rotation and natural composting and encourage biodiversity, which revitalizes the land. These techniques ensure the ingredients used in our products are grown in a way that is both environmentally sustainable and supportive of the local ecosystem.
Regenerative Farming Techniques We Love
Composting
An all-natural way to fertilize! We let our organic waste break down into nutritious compost that can be added back to the soil.
Winter Weed Cover
Weeds aren’t all bad. Winter weed cover provides nutrients for spring crops and helps soil retain water.
Crop Rotation
A different field is given time to rest each season, allowing the soil time to replenish much-needed nutrients.
Fallow Fields
Each season, a different field is given time to rest, allowing the soil time to replenish much-needed nutrients.
Companion Planting
We place plants near their friends! Consider planting bug-repelling calendula near bug attractants like tomatoes to provide natural protection.
Enhanced Soil Quality
With minimal tilling and enriching nutrients, regenerative farming enhances soil quality, leading to healthier, nutrient-rich crops at the Eminence Certified Organic Farm.
Improved Water Conservation
Efficient water use is a hallmark of regenerative farming. Techniques reduce water usage, enhance soil water retention and minimize harmful runoff.
Diversity in Ecosystems
Crop rotation and pesticide avoidance foster a variety of plant life and support local wildlife, promoting balanced ecosystems and cleaner air.
Addressing Climate Change
Our dedication to nature goes hand in hand with our commitment to planet Earth. Regenerative farming plays a crucial role in capturing carbon emissions and fostering the growth of robust crops, significantly contributing to climate change mitigation.
Community Engagement
Eminence’s farm is part of a global network of sustainable farms, contributing to new economic opportunities and ecological restoration.
We’re committed to finding organic, Earth-friendly solutions in every aspect of our business. You can learn more about our green initiatives here. What things do you like to do to help the planet? Let us know in the comments below or chat with us on social media.
In the world of beauty, lipstick is a true game-changer. Its ability to transform and enhance our pout is unmatched, but what if I told you that your favorite lipstick can do so much more? Brace yourself, beauty enthusiasts, because today, we are delving into the realm of lipstick hacks that go beyond the lips. Get ready to unlock the full potential of your lipstick collection with these tried and tested creative hacks that will elevate your beauty routine to a whole new level.
1. Blush Brilliance
Let’s start with a classic hack that has been a beauty secret for ages – using lipstick as a cream blush. When you’re in a rush or forgot to pack your blush, simply dab a bit of your favorite lipstick onto your cheeks and blend for a natural, rosy glow. The creamy texture of lipstick makes it perfect for this dual-purpose application, giving your cheeks a radiant flush that lasts all day.
2. Eye-Catching Elegance
Elevate your eye makeup game by using lipstick as an eyeshadow. Select a shade that enhances your eye color and swipe it across your lids for an instant pop of color. The rich pigments in lipsticks make them ideal for creating vibrant eye looks, whether you’re going for a bold statement or a subtle wash of color. Just remember to blend well to prevent any harsh lines.
3. Nail Polish Innovation
Running out of your favorite nail polish shade? No worries – your lipstick collection has got you covered. Break out of the conventional nail polish routine and experiment with lipstick shades for a unique manicure. Simply apply the lipstick directly onto your nails or mix it with clear nail polish to create a custom color that resonates with your mood.
4. Contouring Magic
Sculpt and define your features effortlessly by using lipstick for contouring. Opt for a shade that is a few tones darker than your natural skin tone for contouring and a shade lighter for highlighting.
Apply the darker shade on the sides of your nose, to the hollows of your cheeks, and along your jawline. Blend well, then dab the lighter shade on the high points of your face – the bridge of your nose, the tops of your cheekbones, and your cupid’s bow – to accentuate and highlight.
5. Temporary Hair Highlights
Turn heads with temporary hair highlights using lipstick. Select a vibrant, bold shade and apply streaks or highlights to your hair for an edgy, avant-garde look. This hack works exceptionally well on lighter hair shades, creating a fun and temporary transformation without the commitment of hair dye.
6. DIY Tinted Lip Balm
Revitalize and moisturize your lips by transforming your favorite lipstick into a tinted lip balm. Mix a small amount of lipstick with a clear lip balm or petroleum jelly to create a hydrating and pigmented lip treatment. This DIY tinted lip balm is perfect for achieving a subtle, natural look while keeping your lips soft and kissable.
7. Fabric Stain Remover
Unexpected stain on your favorite blouse? Lipstick to the rescue! Believe it or not, lipstick can be an effective stain remover for fabric. Apply a small amount of lipstick to the stain, gently rub, and watch the magic happen. The waxy texture of the lipstick can help break down and lift stains, saving your clothes from an untimely demise.
8. Artistic Expression
Unleash your inner artist by using lipstick as a medium for creative expression. Whether you’re into painting, drawing, or crafting, the vibrant pigments in lipstick can be an exciting addition to your artistic endeavors. Experiment with different textures and shades to bring a unique flair to your creative projects.
Unleash Your Artistic Side
Your lipstick collection is a treasure trove of possibilities waiting to be explored. These creative hacks not only showcase the versatility of lipstick but also allow you to make the most out of your beauty arsenal.
From enhancing your features to expressing your artistic side, these tried and tested lipstick hacks will undoubtedly elevate your beauty routine and inspire you to think outside the lip-lined box. So, don’t be afraid to get creative and let your lipstick shine in ways you never imagined!
FAQs
Q: What are some creative lipstick hacks for a natural blush?
A: To achieve a natural blush, consider using your favorite lipstick as a cream blush. Dab a small amount on your cheeks and blend for a rosy, radiant glow.
Q: Can lipstick be used as eyeshadow for vibrant eye looks?
A: Absolutely! Lipstick can double as eyeshadow, providing rich pigments for vibrant eye looks. Choose a shade that complements your eyes and blends for a stunning pop of color.
Q: How do I contour with lipstick for a sculpted look?
A: Contouring with lipstick is a game-changer. Select a shade darker than your skin for contouring and a lighter shade for highlighting. Apply strategically, blend well, and accentuate your features effortlessly.
Q: What’s a quick DIY tinted lip balm using lipstick?
A: For a DIY tinted lip balm, mix your favorite lipstick with clear lip balm or petroleum jelly. This simple hack creates a hydrating and pigmented lip treatment, perfect for a subtle, natural look.
Q: Any innovative uses for lipstick beyond beauty routines?
A: Absolutely! Lipstick goes beyond beauty – use it as a fabric stain remover, temporary hair highlight, or even as a creative medium for art projects. Explore the versatile world of lipstick beyond conventional applications.
The allure of a perfectly executed winged eyeliner is undeniable, but mastering this art requires the right techniques and a bit of practice. Whether you’re a beginner or looking to up your winged eyeliner game, we’ve got you covered with easy-to-follow tips and tricks tailored for you.
Table Of Contents
How To Do Winged Eyeliner
Applying winged eyeliner may seem challenging, but with the right technique and a bit of practice, you can achieve a flawless and stylish look. Here’s a step-by-step guide on how to apply winged eyeliner:
What You’ll Need
Eyeliner: Choose your preferred type, whether it’s liquid, gel, or pencil. Liquid eyeliners with felt-tip applicators are often recommended for precision.
Brush or Applicator: If you’re using gel eyeliner, you’ll need an angled brush for application.
Concealer and Concealer Brush: Optional for cleaning up any mistakes and achieving a sharp line.
3-Step Guide to Applying Winged Eyeliner
Create the Base Line: Start at the inner corner of your eye, drawing a thin line along your lash line towards the outer corner.
Draw the Wing: Imagine a line extending from your lower lash line towards your eyebrow. From the outer corner, draw a line connecting to this imaginary point, creating a wing.
Connect and Fill: Connect the wing to the base line, forming a triangle. Fill in the triangle smoothly for a finished look. Adjust the angle and length as desired.
Additional Tips
Steady Hand: Maintain stability by resting your elbow on a surface while applying.
Practice Symmetry: Achieve balance by comparing and adjusting the wings on each eye.
Experiment with Style: Adapt the thickness and length of the wing to suit your personal style, eye shape, and eye color.
Tips And Tricks For Perfect Winged Eyeliner
1. Choosing the Right Tools
The journey to a flawless wing starts with the right tools. Invest in a good quality liquid eyeliner for precision. For beginners, a felt-tip applicator provides control, while seasoned enthusiasts might prefer a fine brush for more artistic freedom.
2. Understanding Eye Shapes
Tailor your winged eyeliner to your unique eye shape. For hooded eyes, create a slightly thicker line to ensure visibility when the eyes are open. Almond eyes can carry a classic wing beautifully, while smaller eyes benefit from a subtle, small wing for an open-eyed effect.
3. Perfecting the Flick
The flick is the star of the show. To achieve a flawless flick, imagine an extension of your lower lash line and use it as a guide. Angle it slightly upward for a lift. For beginners, create small dashes along the lash line and connect them to form a smooth line.
4. Double Wing Drama
Elevate your winged eyeliner game by experimenting with a double wing. After creating your classic wing, add a smaller flick underneath for added drama. This look is perfect for those aiming to make a bold statement.
5. Coordinating with Eyeshadow
Coordinate your winged eyeliner with your eyeshadow for a cohesive look. For a daytime charm, opt for neutral shades, and for an evening allure, experiment with smoky eyeshadows that compliment your liner.
6. Applying Winged Eyeliner for Beginners
Beginners often struggle with symmetry. Start with your dominant eye and replicate the shape on the other. If your hands tend to shake, rest your elbow on a stable surface for added control.
7. Experimenting with Applicators
Various eyeliner applicators are available, from pens to brushes. Test different applicators to find the one that suits your style and comfort level. Some may prefer the precision of a fine brush, while others find the control of a pen more manageable.
8. Adapting to Eye Shape
Different eye shapes require different approaches. For round eyes, create a slightly curved wing to elongate. For downturned eyes, extend the wing slightly upward to lift the eyes.
9. Maintaining a Clean Look
Avoid smudging by allowing the liner to dry completely before opening your eyes fully. If mistakes occur, a cotton swab dipped in makeup remover can clean up edges without disturbing the rest of your makeup.
10. Practice and Patience
Mastery comes with practice. Start with small, manageable wings and gradually increase the intensity as you become more confident. Remember, every makeup artist was once a beginner.
Achieving the perfect winged eyeliner is a journey, not a destination. Embrace the process, experiment with different styles, and find what works best for you. With these tips and tricks, you’ll be well on your way to flaunting a flawless flick that complements your unique style and eye shape.
Different Winged Eyeliner Styles
Winged eyeliner styles offer a versatile and artistic way to accentuate your eyes. Here are some popular winged eyeliner styles to experiment with:
1. Classic Wing
The timeless and universally flattering style involves a sleek and upward flick at the outer corner of the eye, creating a graceful wing.
2. Double Wing
Elevate your look by adding a second wing beneath the classic flick. This bold style adds drama and is perfect for special occasions.
3. Subtle Flick
Ideal for a natural look, a subtle flick involves a small, gentle wing that enhances your eyes without being too dramatic.
4. Graphic Wing
Express your creativity with a graphic wing. Experiment with geometric shapes, angles, or even curves for a modern and artistic flair.
5. Dramatic Cat Eye
Amp up the drama with a bold and elongated wing. This style extends beyond the outer corner for a captivating and intense look.
6. Floating Liner
Create a distinctive look by applying the wing above the crease, giving the illusion of a floating line. This avant-garde style adds a touch of edginess.
7. Colored Wing
Infuse vibrancy into your eye makeup by using colored eyeliners for the wing. Experiment with different hues to complement or contrast with your eyeshadow.
8. Arched Wing
Mimic the shape of your eyelid by arching the wing slightly upward. This style complements almond-shaped eyes and adds a subtle lift.
9. Smudged Wing
For a smoky and sultry appearance, smudge the winged liner with a brush or cotton swab. This style is perfect for a relaxed, lived-in look.
10. Inverted Wing
Flip the winged liner concept by applying it to the lower lash line. This inverted wing adds a unique and unexpected touch to your eye makeup.
11. Gradual Thickening
Start with a thin line near the inner corner and gradually thicken the wing as you move outward. This style offers a dynamic and eye-catching effect.
12. Glitter Wing
Add a touch of sparkle by incorporating glitter into your winged eyeliner. Choose a subtle shimmer for a daytime look or go bold with vibrant glitter for an evening event.
Remember, the beauty of winged eyeliner lies in its versatility. Feel free to experiment with these styles, combining elements to create your own signature look. Whether you prefer a classic and refined wing or want to explore bold and innovative designs, winged eyeliner styles offer endless possibilities for expressing your individuality.
Hacks To Perfect Your Winged Eyeliner
Mastering the perfect winged eyeliner can be a game-changer in your makeup routine. Here are some hacks to make the process easier and ensure flawless results:
1. Use Tape as a Guide
Place a small piece of scotch tape from the outer corner of your eye to the end of your eyebrow. This creates a clean, sharp line when you apply your wing, and you can easily peel off the tape for a precise edge.
2. Map Out Your Wing
Before committing to the liner, use small dots or dashes to map out the shape of your wing. This acts as a guide and makes it simpler to connect the dots for a smooth line.
3. Start with a Pencil Liner
If you’re new to winged eyeliner, begin with a pencil liner to sketch out the shape. Once satisfied, trace over it with a liquid or gel liner for a more defined and lasting finish.
4. Opt for a Felt-Tip Eyeliner
Felt-tip eyeliners offer control and precision, making them ideal for creating a sharp wing. The fine tip allows for easy application, especially for those intricate details.
5. Use a Spoon as a Stencil
Place the handle of a spoon against the outer corner of your eye to create a smooth curve. This makeshift stencil helps guide your wing and ensures a consistent shape on both eyes.
6. Correct Mistakes with Concealer
If your wing isn’t as sharp as you’d like, use a small, angled brush to apply concealer along the edges. This not only cleans up any mistakes but also highlights and defines the wing.
7. Apply Eyeliner with Your Eyes Open
For an accurate wing that complements your eye shape, apply eyeliner with your eyes open. This way, you can see how the wing will look when your eyes are in their natural state.
8. Set with Translucent Powder
To prevent smudging and keep your wing in place all day, lightly dust translucent powder over the eyeliner. This also helps absorb any excess oil on your lids.
9. Experiment with Angles
Tailor your wing to your eye shape by experimenting with different angles. Adjust the tilt and length to find what complements your eyes best.
10. Connect the Dots
If creating a continuous line seems challenging, try connecting small dots along your lash line. Once the dots are in place, go back and fill in the spaces, connecting them for a seamless wing.
11. Freeze Your Eyeliner
Before sharpening your pencil eyeliner, place it in the freezer for a few minutes. This prevents the tip from crumbling, ensuring a smooth application.
12. Use a Business Card for a Straight Line
Hold a business card against the outer corner of your eye to create a straight line for your wing. This hack is especially useful for achieving a precise and even flick.
Winged eyeliner can be tricky, but with these tips and tricks and hacks, you’ll be able to create a flawless wing with ease. Don’t be afraid to experiment and find the techniques that work best for your unique eye shape and personal style.
FAQs
Q: What tools do I need to apply winged eyeliner?
A: To apply winged eyeliner, you’ll need an angled eyeliner brush or a felt-tip eyeliner pen for precision. Additionally, have some makeup remover and cotton swabs on hand for corrections.
Q: How do I choose the right eyeliner for a winged look?
A: Opt for a waterproof or long-wearing eyeliner formula to ensure your winged liner stays in place throughout the day without smudging.
Q: What is the first step in applying winged eyeliner?
A: Start by creating a thin line along your upper lash line using short strokes, gradually building the line from the inner to the outer corner of your eye.
Q: How do I create the winged part of the eyeliner?
A: Extend the line slightly beyond the outer corner of your eye, angling it upwards towards the end of your eyebrow. This creates the winged effect.
Q: Any tips for achieving a symmetrical wing on both eyes?
A: Use small dots to map out the liner’s shape on both eyes before connecting the dots. This helps maintain symmetry and balance.
Q: Should I apply winged eyeliner with my eyes open or closed?
A: It’s often easier to apply winged eyeliner with your eyes open, as this allows you to see the natural shape of your eyes and ensures the wing complements your eye shape.
Q: How can I fix mistakes when applying winged eyeliner?
A: Dip a cotton swab in makeup remover to gently erase any mistakes. For a more defined edge, use a concealer brush with a small amount of concealer to clean up the lines.
Q: Can I create a subtle winged look for daytime?
A: Absolutely! For a daytime look, keep the wing subtle by creating a shorter and thinner wing. Use softer, neutral eyeshadow shades to complement the overall look.
Q: Any advice for beginners applying winged eyeliner?
A: Start with short, light strokes, and practice gradually. It’s easier to build up the line than to correct a thick, uneven line.
Q: How do I set winged eyeliner to prevent smudging?
A: After applying winged eyeliner, consider setting it with a matching eyeshadow or a translucent setting powder to enhance its longevity and prevent smudging.
Our Strawberry Rhubarb Dermafoliant has earned its status as a skin care staple. Celebrated for its efficacy, this gentle rice-based exfoliator leaves your complexion looking more refined, bright and polished. Here are six reasons why beauty editors, celebrities and makeup artists call this a favorite — and why it should be a part of your routine.
6 Reasons To Add Strawberry Rhubarb Dermafoliant To Your Routine
1. Beauty Editor And Celebrity Reviews
Beauty experts test tons of products. Even with a bevy of other exfoliators to grab their attention, beauty experts agree that our Strawberry Rhubarb Dermafoliant is the key to beautiful skin. Refinery29’s beauty editors call it the perfect pick to keep skin in tip-top shape between spa visits. Westworld star Thandiwe Newton also swears by it, saying: “Completely natural and organic, smells divine and is gentle enough (but properly effective) to use morning and night.” Celebrity makeup artist Pati Dubroff includes Strawberry Rhubarb Dermafoliant in her skin care arsenal, revealing to NewBeauty that it is a must-have for her A-list clients.
2. Made With Natural Ingredients
With the addition of water, Strawberry Rhubarb Dermafoliant transforms into a creamy yet polishing paste that sloughs away dead cells and buffs the skin’s texture, revealing a smooth, flawless-looking complexion. This popular exfoliant is infused with natural ingredients that work together to cleanse and polish the skin. Strawberries containing salicylic acid gently exfoliate and remove impurities to brighten the skin and shrink the appearance of pores. Rhubarb, another key ingredient, is an excellent source of ascorbic acid and vitamins that minimize the visible signs of aging. Chickpea flour reduces the appearance of pores while lactic acid plus rice gently slough off dead skin cells to improve skin texture for a rejuvenated appearance.
3. Dermascope Aestheticians’ Choice Award Winner
Over the years, the Strawberry Rhubarb Dermafoliant has won its share of awards. In 2021, over 73,000 votes were cast by licensed aestheticians and industry professionals, selecting our the exfoliant as “Favorite Exfoliating Scrub” at the Dermascope Aestheticians’ Choice Awards. It also won “Best Facial Exfoliator” at the Spa & Wellness Mexicaribe Product Awards in 2020 and “Best Exfoliating Products for Sensitive Skin” at The Zoe Report Awards in 2020. The accolades received by the Strawberry Rhubarb Dermafoliant from industry experts and professionals speak volumes about its quality and effectiveness. This widespread recognition leads us to delve into what makes it so special: the Dermafoliant’s innovative blend of both physical and chemical exfoliation methods.
4. Uses Both Physical And Chemical Exfoliation
The acclaim garnered by the Dermafoliant is largely attributed to its distinctive formulation. This exfoliant uses both physical and chemical exfoliation to offer your skin a dual-action polish. The physical exfoliation is thanks to the inclusion of rice flour that buffs and smooths texture. Rice acts as a soft exfoliant, enhancing and refining skin texture, and effectively soaks up surplus oil. Additionally, adzuki flour plays a role in revitalizing and illuminating the skin, while oat flour offers hydrating benefits and contributes to a smoother skin appearance by eliminating surface dirt and impurities. At the same time, lactic and salicylic acids remove dead skin cells via chemical exfoliation, revealing flawless-looking skin. Lactic acid specifically hastens the exfoliation process, promoting the emergence of new skin cells for a glowy complexion. This formula also contains a Biocomplex2™, a booster of antioxidants, Coenzyme Q10 and alpha lipoic acid to reduce the appearance of fine lines and wrinkles.
5. Multiple Ways To Exfoliate
Designed to activate when combined with water, the Strawberry Rhubarb Dermafoliant is what you call a powder-to-paste exfoliant. To use correctly, dispense a small amount of dry powder to your hand, add a few drops of water and rub your hands together. When you add water, you’ll see the texture transforming. You can either use it on its own as a paste or if you prefer, mix this in with a cleanser. It’s customizable and totally up to you!
6. Naturally Scented
Beyond its adaptable application, the Strawberry Rhubarb Dermafoliant also stands out for its delicious natural fragrance. This daily-use cleansing exfoliant is infused with the enticing aroma of strawberries and rhubarb. Plus, strawberries are an excellent source of Vitamin C, flavonoids and ellagic acid which all combine to promote a radiant-looking appearance.
Product Reviews: What Do Customers Say?
From its enticing scent to its remarkable results, this best-selling product is a favorite for many. But don’t just take our word for it — our customers have a lot to say about their experiences with this product. One customer, Jennifer, states: “Love this stuff! I have been using this product for about 9 months. I turned 50 and realized I needed to start a good skin care routine … This was recommended by a friend. My skin looks amazing!”
Another customer, Bethanne, says: “I have been hunting down something like this for a long time and had high hopes when a friend told me about this line of products. I bought this and have used it for a couple of months now and I am sold! It’s not too abrasive. It smells delicious. I don’t have any sensitivity issues with it. It’s 100 stars!”
After hearing these reviews, we’re eager to get yours too. Is Strawberry Rhubarb Dermafoliant part of your skin care routine? We’d love to hear what you love about it! Share your thoughts with us in the comments below or join the conversation on social media.
K-beauty introduced many of us to the world of snail mucin, promising a path to radiant,glass-like skin. With so many TikTok and Instagram influencers endorsing this trend, it seemed like the perfect solution for achieving that coveted glow. While touted as a miraculous ingredient that can work wonders for your skin, there are some crucial aspects to consider before you hop on the bandwagon.
From ethical concerns about how snail mucin is harvested to potential allergic reactions, this product has been facing quite a bit of backlash in recent months. This product promises gentle hydration, skin protection, a boost of collagen, and reduced irritation, but complaints of adverse reactions, such as breakouts, fungal acne, hives, and tiny forehead bumps are running rampant across social media. This raises the question: how can such a seemingly gentle ingredient cause so many issues? Whether you’re considering steering clear of snail mucin due to allergies, ethical concerns, or a general aversion to sticky, slimy substances (gross!), here is what I believe (as a product formulator), are the pros and cons of incorporating this product into your beauty routine. Let’s get into it!
What Is Snail Mucin?
Snail mucin, also known as snail secretion filtrate, is derived from snails, or mollusks (organisms that live inside of a shell). This secretion contains a complex composition, including polysaccharides, vitamins A, C, and E, collagen, elastin, proteins, allantoin, alpha hydroxy acids (AHAs), and other beneficial components that are believed to offer a range of skincare benefits. From hydrating the skin to promoting collagen production and soothing irritation, snail mucin has garnered attention for its potential to address various skin concerns.
What Is The Ethical Dilemma Surrounding Snail Mucin?
While snail mucin has become a trendy product promoted at every turn, it’s important to consider the ethical implications of its production process and the potential risks associated with its usage. To be clear, this mucin is not from snails just crawling around– these creatures are stressed or wounded to stimulate mucin secretion, which is then collected for skincare use.
Unlike animal products like beeswax, where the extraction is not only harmless to the animal but is even deemed necessary (so they can replenish their hive), snail mucin extraction is an entirely unnecessary and painful process. This process has raised ethical concerns, especially for those prioritizing animal rights.
What Are The Benefits Of Snail Mucin?
Despite the ethical concerns, snail mucin boasts a range of potential benefits for the skin. Snail mucin is primarily beneficial in helping restore moisture and improve skin texture, making it particularly appealing for individuals with dry or dehydrated skin. Moreover, the presence of AHAs in snail mucin can contribute to gentle exfoliation, promoting a smoother, more radiant complexion.
Additionally, snail mucin is believed to aid in skin repair and regeneration, potentially accelerating the healing process for acne scars and other skin imperfections. With its supposed ability to soothe inflammation and reduce redness, snail mucin has gained a following among those seeking to address sensitive or irritated skin concerns– but let’s dive into why I don’t think this is a good idea.
Why Are Some People Experiencing Negative Reactions?
Recently, an influx of negative reviews has been circulating claiming that snail mucin is causing reactions such as breakouts and irritation. The reason for this likely has to do with it being a natural substance that comes from a biological organism. Simply put, snail mucin is a complex mixture similar to human sweat– just like we sweat when we are stressed out, snails emit mucin when stressed. Unfortunately for those with sensitive or reaction-prone skin, complex mixtures generally mean a higher likelihood of adverse reactions. This is why I recommend that those with sensitive or reactive skin types stick to simple products.
For the most part, people should probably be okay with this product. However, if you have sensitive skin, a damaged skin barrier, or a condition like rosacea, you may want to tread carefully.
What Should I Do If I Want To Try Using Snail Mucin?
If you’re intrigued by the potential benefits of snail mucin and wish to incorporate it into your skincare routine, it’s essential to approach its usage with caution. Conducting a patch test before fully integrating new products into your regimen can help identify any unwanted reactions or sensitivities. This simple yet crucial step can prevent potential skin irritation and discomfort, allowing you to make an informed decision about its suitability for your skin.
Additionally, researching brands that prioritize ethical sourcing and sustainable practices in their snail mucin extraction can offer peace of mind for conscientious consumers. It’s important to note that not all snail mucin is the same. These products can vary depending on where the snails come from, how stressed out they are, or even how the product is handled by the supplier. While your skin may react well to one snail mucin product, there’s still a risk when trying another from a different brand.
What Are Some Alternatives To Using Snail Mucin?
For those seeking hydration without the risks associated with this slimy substance, keep an eye out for products containing humectants like glycerin and hyaluronic acid, as well aspolysaccharides like algae. The following are my favorite ways to achieve an extra surge of hydration.
Toners
I’ve come to learn that many people do not believe in the power of toners, but I’m here to tell them just how much they’re missing. From a hydration perspective, toners likeMoisture Infusion Toner andElderberry Soothing Toner are great for boosting the skin’s moisture content. Not only that but it’s also thought that damp skin is 10 times more permeable than dry skin, meaning any serums that are applied after will be able to penetrate deeper.
Just remember to follow theGolden Minute rule so that you aren’t dehydrating your skin further!
Hydrating Serums
Hydrating serums likeSkin Drink Concentrate, which containshyaluronic acid (a powerful humectant) and aloe vera, can offer hydration that rivals, if not surpasses, that of the polysaccharides within snail mucin. Due to the simplicity of these ingredients, you’ll also be reducing the likelihood of irritation on your skin.
Moisturizers
Not only are they a great source of hydration but moisturizers are also key in strengthening the skin’s barrier, reducing transepidermal water loss (TEWL), and making for overall happier, healthier skin. Products likePhytolipid Comfort Creme,Pure Radiance Creme Masque, andDaily Mattifying Solution all contain algae (or algae extracts), a polysaccharide that keeps the skin plump and hydrated.
Find out more aboutwhich moisturizer is right for you.
While some may benefit from its hydrating and skin-repairing properties, the harsh reality of how snail mucin is harvested and the potential risks that it poses may be the reason for its imminent fall from the limelight. Luckily, this is far from the only product that can provide these hydrating, soothing, and skin-healing benefits. While searching for alternatives to snail mucin, especially when dealing with sensitive skin, be sure to look for simple products containing ingredients like hyaluronic acid, glycerin, algae, and aloe, as well as ceramides and peptides.
I hope you found this post helpful and as always #obeyrenee!
Lastly, if you’re looking to minimize (or even completely reverse) the effects of dry skin, here arethe best ingredients to use and avoid.
Celebrity Esthetician & Skincare Expert As an esthetician trained in cosmetic chemistry, Renée Rouleau has spent 30 years researching skin, educating her audience, and building an award-winning line of products. Her hands-on experience as an esthetician and trusted skin care expert has created a real-world solution — products that are formulated for nine different types of skin so your face will get exactly what it needs to look and feel its best. Trusted by celebrities, editors, bloggers, and skincare obsessives around the globe, her vast real-world knowledge and constant research are why Marie Claire calls her “the most passionate skin practitioner we know.”
As we age, our skin undergoes various changes, and so should our approach to makeup. Embracing the natural beauty that comes with maturity involves adapting our makeup routine to enhance and celebrate the unique qualities of mature skin.
Let’s delve into tips and techniques to help you achieve a radiant and age-appropriate makeup look that highlights your wisdom and experience.
1. Hydration is Key
Mature skin tends to be drier, so prioritizing hydration is crucial. Begin your makeup routine with a moisturizing primer to create a seamless base for makeup application. Choose hydrating foundations and concealers to avoid emphasizing fine lines and wrinkles. Look for products with components like hyaluronic acid and glycerin to lock in moisture.
2. Lightweight Foundations
Opt for lightweight, dewy foundations instead of heavy, matte formulas. Foundations with a heavy consistency may settle into fine lines, making the skin appear dull. Choose foundations with a luminous finish to add a healthy glow and create a more youthful appearance.
3. Concealer Techniques
Use a lightweight, hydrating concealer to cover any dark circles or imperfections. Apply concealer sparingly to avoid accentuating fine lines. Consider a slightly lighter shade to brighten the under-eye area, but be cautious not to overdo it.
4. Embrace Cream Blush
Cream blushes are ideal for mature skin as they provide a natural, dewy finish. Cream formulations blend seamlessly into the skin, giving a youthful flush. Dab the blush onto the apples of your cheeks and blend gently for a radiant, lifted effect.
5. Soft and Defined Brows
Well-groomed eyebrows can frame the face and lift the eyes. Use a soft eyebrow pencil or powder to fill in sparse areas, opting for a color that matches your natural brow shade. Avoid overly harsh lines; softer, defined brows can create a more youthful look.
6. Eye Makeup for Depth
Focus on enhancing your eyes with neutral, earthy eyeshadows. Matte and satin finishes are preferable to shimmery textures, as they are less likely to settle into creases. Consider tightlining the upper lash line to define the eyes without the need for heavy eyeliner.
7. Luscious Lashes
Before applying mascara, use an eyelash curler to open up your eyes. Choose a lengthening and volumizing mascara to add definition without clumping. If you prefer false lashes, opt for natural styles that enhance without overpowering.
8. Subtle Lip Tints
Avoid dark and heavy lip colors that can age the overall appearance. Instead, opt for sheer lip tints, glosses, or creamy lipstick formulas in natural shades. Soft pinks, peaches, and rosy tones can add a touch of color without appearing too bold.
9. Set with Finishing Powder
Set your makeup with a light dusting of translucent powder to minimize shine. Be cautious not to use excessive powder, which can settle into fine lines. A light touch is key to maintaining a fresh and dewy finish.
10. Skincare as a Foundation
Lastly, prioritize a consistent skincare routine. Healthy, well-nourished skin provides a better base for makeup application. Regular exfoliation, moisturizing, and sun protection are essential to maintaining a radiant complexion.
Makeup for mature skin is all about embracing and celebrating the beauty that comes with age. By focusing on hydration, using lightweight formulations, and choosing soft, flattering colors, you can enhance your features and radiate confidence at any age. Remember, the goal is not to conceal but to highlight the unique qualities that make you beautifully mature.
FAQs
Q: What are the best foundations for mature skin?
A: Look for hydrating foundations with a dewy finish. Lightweight formulas with ingredients like hyaluronic acid provide a natural, youthful glow.
Q: How can I prevent makeup from settling into fine lines and wrinkles?
A: Prioritize skincare, use a moisturizing primer, and opt for lightweight, luminous formulations to minimize the appearance of fine lines.
Q: Are there specific tips for enhancing the eyes without emphasizing wrinkles?
A: Use neutral eyeshadows in matte or satin finishes, focus on defining the lashes, and consider tightlining for a subtle yet impactful eye makeup look.
Q: What lip colors work best for mature skin?
A: Choose sheer lip tints, glosses, or creamy lipsticks in soft, natural shades such as pinks, peaches, and rosy tones for a flattering and age-appropriate look.
Q: How can I achieve a youthful flush with blush without overdoing it?
A: Opt for cream blushes for a natural, dewy finish. Apply sparingly to the apples of the cheeks and blend gently for a radiant and lifted effect.
Q: Should I use powder on mature skin?
A: Yes, but use a light hand. Set your makeup with a translucent powder to minimize shine, but be cautious not to apply excessive powder, which can settle into fine lines.
Q: Can mature skin wear false lashes?
A: Absolutely! Choose natural styles that enhance without overpowering. Before applying mascara, give your lashes a gentle curl to achieve an enhanced lifted appearance.
Q: How important is skincare in achieving a great makeup look for mature skin?
A: Extremely important. A consistent skincare routine, including exfoliation, moisturizing, and sun protection, provides a healthier canvas for makeup application.
Q: Are there specific brow techniques for mature women?
A: Use a soft eyebrow pencil or powder to fill in sparse areas. Aim for defined yet natural-looking brows to frame the face and lift the eyes.
Q: Can mature skin use matte products?
A: While matte products can be used, it’s advisable to choose formulations that aren’t overly drying. Hydrating matte options can provide a polished look without emphasizing dryness.
Are you ready to build a skin care routine but not sure where to start? Enter: The Eminence Organic Skin Care Best Sellers List! These are the tried and true products that licensed estheticians and skin care enthusiasts (like you!) swear by. Keep scrolling to find out how to incorporate these best-selling favorites into your skin care routine for day and night.
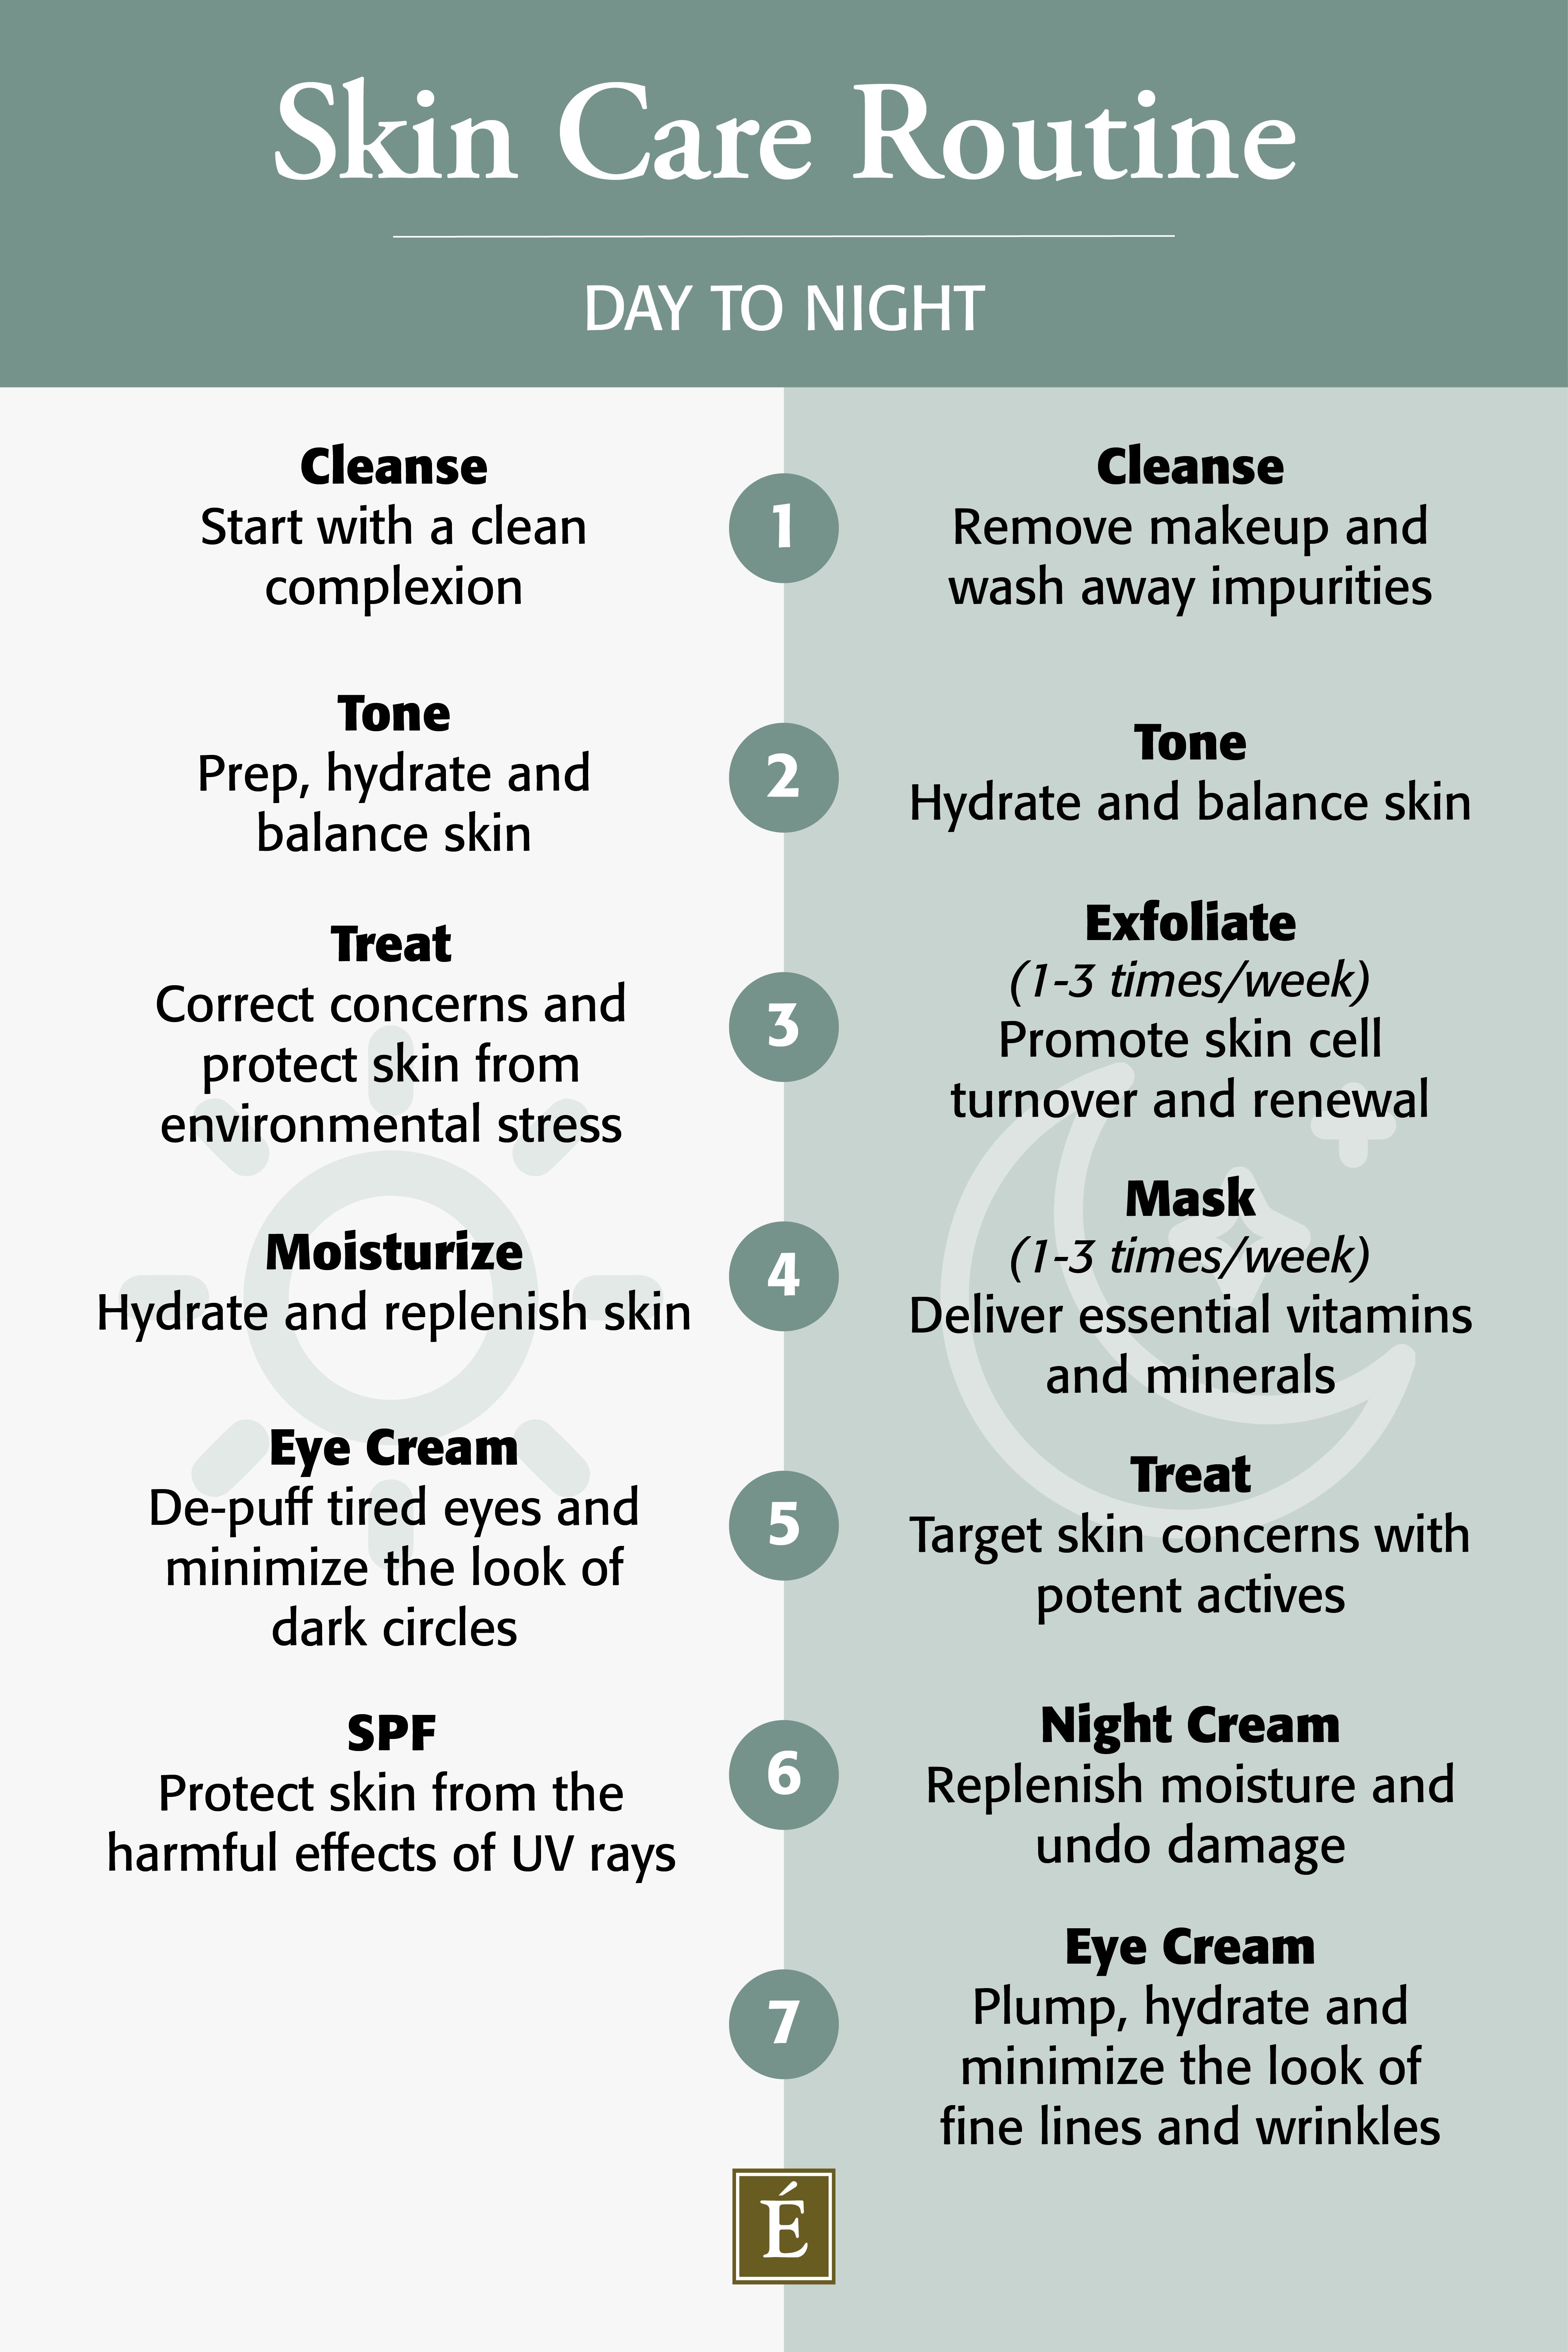
Your morning skin care routine is all about prep and protection to get your skin ready to face the day ahead. Here are six daily skin care steps to follow:
To get your morning routine started off right, we suggest the Mangosteen Daily Resurfacing Cleanser. This milky gel cleanser uses lactic acid to gently dissolve dead surface cells and reveal the glowing skin underneath. The face feels fresh and perfectly cleansed, not over-stripped. Surface buildup, impurities and blockages are removed, leaving the complexion looking clear, smooth and radiant.
Another option is to begin your day with the Stone Crop Gel Wash. A great choice for even the most sensitive skin, this gel cleanser contains stone crop, which hydrates and nourishes, plus revitalizing chamomile and restorative shea butter. The result is skin that appears clear, smooth and bright.
Application Tip: Cleanse with tepid water
Hot water has the potential to irritate and dry out your skin. Instead, cool things down with lukewarm water to help keep your moisture barrier intact.
2. Tone
Many of us skip this step in our skin care routines. Why? We tend to associate toners with stripping, alcohol-based astringents. However, today’s formulas have evolved to deliver moisture and nutrients that balance skin tone and prep the skin. Natalie says: “Think of your cleanser and toner as the shampoo and conditioner for your skin … Remember to use both of them daily.”
Try the Stone Crop Hydrating Mist. Ideal for all skin types, this refreshing facial mist is infused with stone crop to boost hydration and leave skin looking smooth and revitalized. This toner is particularly helpful for uneven skin types as it makes the skin appear clear, fresh and vibrant.
Application Tip: Apply to damp skin
According to Health Magazine, “Moist skin is 10 times more permeable than dry skin.” Apply a few spritzes of toner or facial mist while your skin is still damp to soak in all the skin care benefits.
3. Treat
Natalie tells us: “After you’ve prepped the skin, it’s time for all the finishing products. We always like to do what we call a “treatment” to your skin, and this helps if you have something that you want to minimize or reduce the appearance of.” Serums, concentrates and facial oils deliver active ingredients deep into the skin, helping to correct concerns and protect skin from damage caused by oxidative stress.
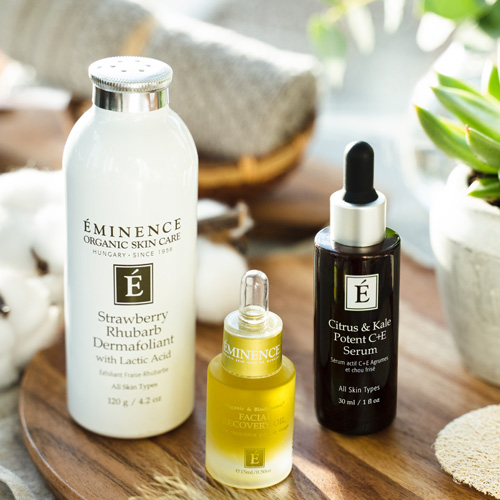
Three of our favorite treatments are the Citrus & Kale Potent C+E Serum, the Strawberry Rhubarb Hyaluronic Serum and the Mangosteen Daily Resurfacing Concentrate.
The Citrus & Kale Potent C+E Serum improves the look of fine lines and wrinkles. The potent Vitamin C in this serum is stabilized by botanically-derived ferulic acid and full of antioxidant-rich leafy greens to help improve the appearance of skin elasticity and hydration, while brightening the skin and improving the look of fine lines and wrinkles.
The Strawberry Rhubarb Hyaluronic Serum contains salicylic acid that gently exfoliates and brightens the look of the skin while boosting hydration. The Mangosteen Daily Resurfacing Concentrate includes aLactic Acid Complexand antioxidant-rich mangosteen to resurface the skin, refine the look of pores and provide protection from environmental stressors.
Application Tip: Less is more
Serums, concentrates and facial oils are incredibly potent. You only need to apply three drops (oils and serums) or two pumps (concentrates) to experience their full benefits.
Product Picks
Restore and smooth
Vitamin C serum for all skin types
4. Moisturize
All skin types need a moisturizer (yes, even if your skin is oily or acne-prone). Moisturizing is a crucial step toward keeping your protective moisture barrier intact and environmental stressors out.
If you’re dealing with mature skin, our Coconut Age Corrective Moisturizer is a great option. As well as moisturizing coconut oil and coconut water, it contains our Natural Retinol Alternative to help skin appear lifted and tightened and PhytoCellTec™ Swiss Green Apple Stem Cellsthat promote elasticity and delay visible signs of aging.
If you prefer something lightweight, try the Strawberry Rhubarb Hyaluronic Hydrator. This gel-cream delivers intense hydration and improves texture and luminosity, leaving skin feeling plumped and refreshed.
Application Tip: Don’t stop at your chin
The skin on your neck and chest needs love too. Apply your moisturizer all the way down to ensure the area stays hydrated and reaps the other benefits of the formula you choose.
5. Apply Eye Cream
Eye creams aren’t just for your nighttime skin care routine. The right formula can work wonders by waking up tired eyes, protecting this delicate area and smoothing fine lines and wrinkles. Eye creams are best applied after serums and you only need a small amount for them to be effective.
Our recommendations for a wide-awake look? Hibiscus Ultra Lift Eye Cream and Neroli Age Corrective Eye Serum. The best-selling Hibiscus Ultra Lift Eye Cream rapidly improves the appearance of puffy eyes, minimizes the look of dark undereye circles and quickly smooths the look of wrinkles.
The Neroli Age Corrective Eye Serum targets the look of undereye wrinkles and crow’s feet. A blend of coconut water and green apple hydrates and moisturizes the delicate skin near the eye.
Application Tip: Keep it cool
Leave the Hibiscus Ultra Lift Eye Cream in the fridge to boost the soothing and cooling effect of its stainless steel rollerball. This will add an extra de-puffing chill to your eye cream application.
6. SPF Protection
It goes without saying but we’ll say it anyway: You need to wear SPF every single day. If you’re looking for a product that does double duty, our Radiant Protection SPF Fluid is a great option. This all-mineral sunscreen offers a hydrating and nourishing feel with a dewy finish. It also contains bakuchiol, a retinol alternative that helps to smooth the skin’s texture and minimize the visible signs of aging.
If you’re after a little coverage and a mattified finish, look no further than the Sun Defense Minerals. Easily applied with the built-in brush, this natural mineral sun care adds a silky matte finish to the skin. Find your shade — or go translucent — for skin that appears even, flawless and smooth.
Application Tip: Apply SPF liberally every 2 hours
For maximum protection, apply sunscreen 15 minutes before sun exposure and then reapply it at least every 2 hours.
Even if you’ve gone makeup-free for the day, it’s important to wash your face morning and night. Washing at night helps remove impurities that have accumulated during the day and have the potential to clog pores, leading to dry, irritated skin and even breakouts. One of the best ways to get rid of buildup on your face is to start with a makeup remover. Our Herbal Eye Makeup Remover uses cucumber, calendula, lavender and chamomile to gently cleanse the eye area without leaving behind an oily residue.
Follow that up with the Stone Crop Gel Wash. Infused with hydrating stone crop, this wash is ideal for all skin types as it cleanses impurities and surface buildup without drying out the skin. We also love this best seller for its ability to deeply cleanse pores without irritation, leaving the skin looking bright and feeling soft and clean.
The Mangosteen Resurfacing Cleanser is another beloved face wash that works for day and night. A customer named Sophie gave it five stars on our website, saying in her review: “This product is by far the best I’ve tried for my skin … leaves it clean and refreshed … the amazing scent adds to the beauty of the product!”
Application Tip: Be gentle
A gentle massage with your fingertips is all it takes to cleanse the skin. Rub the product in using circular motions and then rinse thoroughly with a soft cloth.
2. Tone
Not just for your morning routine, a toner can revitalize your skin as part of your nighttime ritual. If you’re already using it in the morning, why not try the Stone Crop Hydrating Mist before bed too? A few spritzes before your serum will boost hydration and leave skin looking smooth and refreshed.
Application Tip: Try a cotton pad
If you usually spritz on a toner or mist, try spraying it onto a reusable pad and wiping your face down. Not only will it deliver all of the benefits of the ingredients, you’ll get to say goodbye to any remnants of makeup or mask that may have been left behind post-cleanse.
3. Exfoliate
In addition to your regular cleanse, you should exfoliate a few times a week to encourage healthy skin cell turnover and renewal. Daily exposure to environmental stressors can cause buildup on the skin’s surface, making it appear dull, rough and uneven. Regular exfoliation clears this buildup, preventing clogged pores and the development of fine lines and wrinkles.
Refine your skin and achieve a bright and radiant-looking complexion with the Strawberry Rhubarb Dermafoliant. Made with flour from rice, chickpea and oats, this product gently exfoliates and buffs skin’s texture, and also features lactic and salicylic acids to remove dead skin cells. Just add water and watch this powder exfoliant transform into a luxurious paste that removes impurities, refines the appearance of pores and smooths the look of the skin.
Application Tip: Add a powder exfoliant to your cleanser
To save time, double up on your double cleanse. Add Strawberry Rhubarb Dermafoliant to the Stone Crop Gel Wash to add physical and chemical exfoliation to your cleansing routine.
4. Mask
Masking a few times a week is one of the best ways to see visible changes in your skin, fast. Face masks deliver concentrated amounts of vitamins and nutrients to hydrate the skin and treat a variety of skin concerns and conditions — from fine lines and wrinkles to breakouts and large pores. The treatment you choose will depend on your skin type and on the conditions you hope to tackle.
All skin types can benefit from the Citrus & Kale Potent C+E Masque. This cream-gel mask delivers a boost of vitamins to improve the appearance of skin hydration, leaving it looking bright, firm, youthful and smooth.
Application Tip: Double mask
If one mask is good, then two is better, right? Many Eminence Organics masks pair well, and using two or more masks in one session allows you to personalize a formula that will work for your specific needs and give you the results you’re looking for. Try the Strawberry Rhubarb Masque and the Bamboo Age Corrective Masque. If your goal is skin that appears lifted and firm, this mask combo is for you.
Product Picks
Plumping & firming moisturizer
5. Treat
The best time to treat your skin to results-oriented actives and deeply nourishing ingredients is at night to help optimize your skin’s natural repair process. Whether you choose an oil, a serum or a concentrate, ingredients like our Natural Hydroquinone Alternative, Natural Retinol Alternative and Smart Collagen+ Complex can help restore the appearance of the skin overnight.
A few great treatment options include the Facial Recovery Oil or the Bamboo Firming Fluid. Let your skin soak in the goodness of Facial Recovery Oil’s Biodynamic® ingredients. A step up from organic, Biodynamic® methods enhance quality, delivering pure and potent actives that are even higher in vitamins, nutrients and active compounds.
The Bamboo Firming Fluid is a skin-plumping concentrate that will give you tighter-looking skin. Bamboo and coconut deeply hydrate and improve the appearance of elasticity in the skin.
Application Tip: Let it absorb
Natalie recommends letting your chosen treatment absorb fully (usually around five minutes) before moving on to the next step in your routine.
6. Night Cream
It may be tempting to use your daytime moisturizer at night, but their formulas are quite different. Night moisturizers are much richer in texture and are designed to be absorbed while you sleep. Additionally, they aim to fix any damage done to the skin during the day; they replenish moisture, help repair skin’s moisture barrier and target specific concerns like dark spots and the visible signs of aging.
In the evening, it’s vital to replenish your skin with night cream like our Marine Flower Peptide Night Cream or our Monoi Age Corrective Night Cream For Face & Neck. The luxurious Monoi Age Corrective Night Cream is infused with monoi, argan, evening primrose, jojoba and grapeseed oils to deeply hydrate skin and replenish moisture. It also includes an Argan Stem Cell Complex that leaves the skin looking firm and youthful.
The Marine Flower Peptide Night Cream is a rich, velvety overnight essential. Full of botanical peptides, it locks in moisture and minimizes the look of fine lines and wrinkles while you sleep!
Application Tip: Include your neck
Similar to the eye area, the neck has thinner and more fragile skin than the face, making it more vulnerable to the signs of aging. When applying your night cream, be sure to include your neck: Starting from the collarbone, work your way up to your jawline using fluid, upward motions for a natural lift.
7. Eye Cream
Because the delicate skin around your eye area has a different structure than the skin elsewhere on your face, applying your regular night cream won’t be as effective. Eye creams are not only formulated for this fragile area but also contain actives to target the specific issues your eye area is prone to, including dark circles, crow’s feet and puffiness.
At night, choose a rich formula that will deeply hydrate and plump your skin while you sleep. The Marine Flower Peptide Eye Cream is that cream. Not only does it contain naturally derived plant peptides and innovative algae extracts to reduce the visible signs of aging, this versatile eye cream provides long-lasting hydration and visibly improves the appearance of wrinkles, puffiness and dark circles. You’ll wake up to an eye area that is radiant and revitalized.
Application Tip: Be gentle
The skin around your eye area is extremely fragile. Instead of rubbing in your eye cream, use your ring finger to gently tap it into the skin.
Watch Natalie demonstrate how to build a skin care routine that seamlessly incorporates some of these these best-selling products. .
Are you looking to add some of our best-selling products to your skin care routine? Visit your nearest Eminence Organic Spa Partner to find out which products will work for you!
This article was originally written in January 2019.
Artificial Intelligence has come a long way in the past few years, even growing leaps and bounds since the beginning of 2023. With AI’s functionality reaching heights that many of us would never have thought possible only a few years ago, it comes as no surprise that we are beginning to see AI make its way into the skincare industry. From AI skin consultations to personalized product recommendations, the marriage of technology and skincare has become a hot topic at many of the industry trade shows I’ve attended. However, amidst the excitement, it’s crucial to recognize the potential pitfalls that come with relying solely on AI for skincare advice.
I’ve said it time and time again, but AI is only as effective as we are self-knowledgeable. As AI takes the lead in assessing our skin type and bestowing product recommendations, it’s important to know that its final analysis is all dependent on how well we know our own skin. You can take an online quiz or chat with AI, but if you’re not a skin professional and don’t really understand your own skin, then AI can only do so much. Let’s take a look at how AI holds up to in-person expertise– and why I think it still has the potential to be big in 2024!
The Importance of the Human Touch
One of the most common challenges in skincare is that people often struggle to accurately assess their own skin. AI steps in to guide users through this process, helping them answer questions about their skin concerns, genetics, environment, and lifestyle. If you’ve ever used the internet to help you determine your skin type, I’m sure you’ve filled out your fair share of Skin Type quizzes (even like our quiz!) After about 5-10 questions you likely received an assessment that says you’re oily, dry, combination, anti-aging, sensitive, acne-prone, etc. But here’s the thing– while this is a great start to your skincare journey, this unfortunately can’t provide you with the personalization of an experienced professional.
For example, when providing a skin consultation to my clients, I will often perform a pinch test on them. This means I will pinch their skin a couple of times in order to see how quickly, or slowly, their skin turns pink. This then tells me what their circulation is like, allowing me to accurately asses their skin and determine which products suit them best. The personal touch of human estheticians is irreplaceable in consultations. We tailor our inquiries based on individual observations and delve into a person’s skin history, a level of detail that AI currently struggles to replicate.
The Benefits of AI
While AI isn’t ready to take on the skincare industry all on its own, it has ushered in a host of benefits in the meantime. Here are a couple of reasons I think AI is going to greatly complement the skincare industry in 2024.
AI as a Validation Tool:
Despite its limitations, I see AI as a valuable validation tool for estheticians. AI attempts to understand the uniqueness of each person’s skin, adding data to their individual skin story. Combining this data with a professional’s expertise can potentially enhance the overall skincare consultation experience.
Enhancing the Consumer Experience:
The integration of AI into skincare consultations aims to streamline the process. By offering quick and personalized solutions, AI makes skincare more accessible and convenient for users, addressing their needs in real time. This seamless integration contributes to a streamlined process that empowers consumers to navigate their skincare journey with confidence. The convenience and efficiency afforded by AI-driven consultations ensure that skincare becomes a more engaging and empowering experience, meeting the demands of today’s fast-paced lifestyles.
My Skin Rx
What if I told you there was an option that combined professional experience and quick, convenient results? I introduce to you: My Skin Rx. These are 15-minute consultations with our in-house, licensed esthetician Lexi. They are a great way to learn about skincare, why your skin type is more than just oily, dry, or normal (hello 9 skin types!), as well as receive personalized product recommendations all from the comfort of your home. The best part? This service is entirely FREE! Sign up today and learn more about how to achieve your dream complexion.
As AI becomes a more integral part of the beauty industry, my experience in welcoming this technology has been incredibly exciting and exploratory. I foresee AI being a great companion for those at any stage of their skincare journey, bringing benefits to both consumers and estheticians. I’m excited to see the future partnership between innovation and expertise within the world of skincare.
Celebrity Esthetician & Skincare Expert As an esthetician trained in cosmetic chemistry, Renée Rouleau has spent 30 years researching skin, educating her audience, and building an award-winning line of products. Her hands-on experience as an esthetician and trusted skin care expert has created a real-world solution — products that are formulated for nine different types of skin so your face will get exactly what it needs to look and feel its best. Trusted by celebrities, editors, bloggers, and skincare obsessives around the globe, her vast real-world knowledge and constant research are why Marie Claire calls her “the most passionate skin practitioner we know.”
Isn’t it cool how makeup keeps changing and getting better? Lately, there’s been a big shift that makes makeup more doable for everyone, even if you’re just starting out. They’ve made things easier, and there are new kinds of makeup to try. One of the coolest things is color correctors – those colorful concealers that help hide spots and make your makeup look better!
You might have seen celebs and influencers using all those different colored concealers on their faces. It looks a bit crazy, right? Like, why would you put purple on your face? But, trust me; color correcting is worth a shot, especially if you want a more natural makeup look. Before you give it a go, it’s a good idea to learn a bit about color correctors and how they work. It’s like having a secret weapon in your makeup bag!
Table Of Contents
What is Color Correcting?
Color correcting is a makeup technique that involves using specific colors to neutralize or balance out undesired tones on the skin. The concept is based on the color wheel, where colors opposite each other cancel each other out. In the context of makeup and skincare, color correcting is primarily used to address various skin imperfections such as redness, dark circles, sallowness, and discoloration.
Each color corrector corresponds to a specific issue:
Green: Neutralizes redness, such as acne scars or rosacea.
Peach/Orange: Counteracts blue tones, often used to conceal dark circles under the eyes.
Yellow: Combats purple or blue hues, suitable for concealing bruises or veins.
Lavender: Counteracts yellow tones, providing a brightening effect on dull or sallow skin.
Pink: Helps to conceal dark circles and brighten the overall complexion.
The key to effective color correcting is selecting the right shade for the specific issue and applying it before foundation or concealer. The goal is to create a more even skin tone and ensure that the final makeup look appears natural and flawless.
Choosing the Right Color Corrector for Your Skin Tone
Selecting the appropriate color corrector for your skin tone is a pivotal step in achieving effective and natural-looking results. Understanding the principles of the color wheel and how complementary colors neutralize each other is the key to this process.
Fair or Light Skin Tones: Opt for a light peach or pink corrector to counteract under-eye darkness or dullness.
Medium Skin Tones: Consider peach or orange correctors to address hyperpigmentation or dark spots on individuals with medium skin tones.
Olive or Tan Skin Tones: Choose a slightly deeper peach or orange shade for individuals with olive or tan skin tones.
Deeper Complexions: Explore rich orange or red correctors to effectively counteract dark circles and deep discolorations on deeper complexions.
It’s crucial to experiment and find the correct shade that harmonizes with your skin undertones. Additionally, considering the specific concern, whether its redness, dark circles, or sallowness, will further guide the selection process.
Step-by-Step Guide to Color Correcting Techniques
Identify specific skin imperfections such as redness, dark circles, or discoloration that you want to address with color correcting.
Familiarize yourself with the color wheel to know which colors neutralize or counteract different undertones. For example, green neutralizes red, orange counteracts blue or purple, and yellow combats purple or blue hues.
Choose a color corrector that corresponds to your skin concern. Green correctors work well for redness, peach or orange correctors for dark circles, and lavender for sallow or yellow-toned skin.
Start with a clean and moisturized face. Applying a primer can help create a smooth base for color correction.
Use a small amount of color corrector, as a little goes a long way. Dab or swipe the corrector onto the targeted areas using a makeup brush, sponge, or your fingertip.
Gently blend the color corrector into your skin using tapping or patting motions. Ensure seamless blending to avoid noticeable color patches.
If the imperfections require more coverage, layer the color corrector with a concealer or foundation that matches your skin tone. Blend the layers carefully for a natural finish.
Set the color-corrected areas with a translucent setting powder to prevent creasing and ensure long-lasting wear.
Assess your makeup in natural light to ensure that the color correction appears natural and complements your overall look.
Color correcting is a skill that improves with practice. Experiment with different techniques and products to find what works best for your unique skin concerns and tones.
Common Skin Imperfections and Corresponding Color Correction Solutions
Redness
Skin Imperfection: Red or irritated areas, often caused by acne, rosacea, or sensitivity.
Color Correction Solution: Green color corrector neutralizes redness. Apply a small amount to the affected areas before foundation.
Dark Circles
Skin Imperfection: Shadows or discoloration beneath the eyes.
Color Correction Solution: Peach or orange correctors counteract blue or purple tones. Dab a small amount on dark circles and blend gently.
Hyperpigmentation
Skin Imperfection: Dark spots or uneven pigmentation.
Color Correction Solution: Choose a corrector that matches the undertone of your hyperpigmentation – peach, orange, or yellow may be effective.
Sallowness
Skin Imperfection: Yellow or dull complexion.
Color Correction Solution: Lavender corrector helps counteract sallowness and provides a brightening effect. Apply sparingly to areas with a yellow undertone.
Blotchiness
Skin Imperfection: Uneven skin tone with patches of discoloration.
Color Correction Solution: Apply a color corrector that matches the specific undertones of the patches – peach, lavender, or green may be used selectively.
Acne Scars
Skin Imperfection: Residual marks from healed acne.
Color Correction Solution: Green corrector helps neutralize the redness of acne scars. Apply before foundation for a more even complexion.
Underlying Veins
Skin Imperfection: Visible veins or blue-toned areas.
Color Correction Solution: Yellow or peach correctors can help counteract the blue tones of veins. Apply a small amount and blend gently.
Dullness
Skin Imperfection: Lack of vibrancy, often due to fatigue or dehydration.
Color Correction Solution: A touch of lavender corrector on areas prone to dullness, like the cheeks or forehead, can provide a subtle brightening effect.
Remember to adapt these color correction solutions based on your unique skin tone and concerns. Experimentation and practice will help you find the most effective combination for achieving a natural and flawless complexion.
Best Practices for Long-Lasting Color Correction Results
Begin with well-moisturized skin for a smooth canvas.
Apply a makeup primer to enhance product adherence.
Invest in high-quality, long-wearing color correctors.
Use a minimal amount of color corrector to avoid a heavy finish.
Layer products in thin, buildable layers for even blending.
Set color-corrected areas with translucent setting powder.
Refrain from touching to prevent makeup disruption.
Finish with setting spray for added longevity.
Adjust routine based on weather conditions (e.g., use oil-free products in humid weather).
Carry a makeup kit for touch-ups, especially in high-friction areas.
Assess makeup periodically in natural light for accuracy.
Use a gentle makeup remover or cleanser during the removal process.
Expert Insights: Color Correcting for Various Skin Types
Expert insights on color correcting for various skin types emphasize the importance of tailoring the approach to individual needs. Different skin types come with unique challenges, and understanding these nuances can help you achieve effective color correction.
For Oily Skin
Experts recommend using lightweight, oil-free color correctors to avoid exacerbating excess oil production. Setting with a mattifying powder can help control shine without compromising the correction.
Keep blotting papers handy to absorb excess oil and maintain a fresh, matte look throughout the day.
For Dry Skin
Moisturizing before color correction is crucial for those with dry skin. Opt for creamy or liquid correctors that won’t accentuate dry patches, and consider using hydrating primers to create a smooth canvas.
For Sensitive Skin
Select hypoallergenic and fragrance-free color correctors to minimize the risk of irritation. Patch testing new products is recommended, and a gentle touch during application helps prevent skin sensitivity.
For Combination Skin
Tailoring the approach to different areas of the face is essential for combination skin. Using a variety of corrector textures, such as creams for dry areas and liquids for oily zones, allows for a balanced correction.
For Mature Skin
Choosing color correctors with hydrating properties is crucial for mature skin. Cream or liquid formulations that won’t settle into fine lines are recommended, and a light hand during application helps avoid emphasizing wrinkles.
Also check out these makeup tips for mature skin – a light touch with a luminous blush that apparently adds a youthful glow.
For Acne-Prone Skin
Opt for non-comedogenic, oil-free correctors for acne-prone skin. Green correctors can help neutralize redness from acne, but a gentle touch is vital to avoid aggravating existing breakouts.
For Fair or Dark Skin Tones
Consideration of skin undertones is emphasized for individuals with fair or dark skin tones. Experts recommend selecting color correctors that complement the specific undertones to achieve seamless correction.
For Rosacea-Prone Skin
Individuals with rosacea should be cautious with green correctors, as they can sometimes be too intense. Using a color corrector with a yellow undertone may be a gentler option for neutralizing redness.
General Tips
Consistent skin care routines, including proper cleansing and moisturizing, are crucial for all skin types. Additionally, experts highlight the significance of regularly reassessing color correction needs, as skin conditions can change over time.
Incorporating Color Correcting into Your Makeup Routine
Incorporating color correcting into your makeup routine is a strategic and transformative step that can significantly enhance the overall finish of your look.
Begin by identifying specific skin concerns, such as redness, dark circles, or discoloration, that you wish to address. Once pinpointed, choose the appropriate color corrector based on the principles of color theory.
Integrate color correction after your skincare routine and before applying foundation or concealer. Start with a small amount of product, gradually build up if needed, and blend meticulously to achieve a seamless transition between corrected and natural skin. Tailor the application to your unique skin type and tone, keeping in mind the specific needs of oily, dry, sensitive, or combination skin.
Remember to set the corrected areas with a light touch of translucent powder to ensure longevity and prevent creasing.
Color correcting is a skill that improves with practice. Experiment with different techniques and products to find what works best for your unique skin concerns and tones.
By incorporating color correcting into your makeup routine in a thoughtful and targeted manner, you can effectively address specific skin concerns and achieve a polished, flawless finish.
FAQs
Q: What is color correcting, and how does it work?
A: Color correcting is a makeup technique that involves using specific colored concealers to neutralize or balance out skin imperfections. It works on the principle of complementary colors, where opposite hues on the color wheel cancel each other out. For example, green corrects redness, while peach or orange neutralizes dark circles.
Q: How do I choose the right color corrector for my skin tone?
A: Consider your specific skin concerns and choose a color corrector that corresponds to those concerns. For example, green correctors work for redness, peach or orange for dark circles, and lavender for sallowness. Additionally, take into account your skin tone and undertones when selecting the corrector shade.
Q: Can I skip color correction and just use concealer?
A: While concealer can provide coverage, color correction is specifically designed to address underlying tones like redness or discoloration. Depending on your skin concerns, incorporating color correction into your routine can enhance the effectiveness of concealer and result in a more flawless finish.
Q: How do I prevent color correction from looking too heavy or cakey?
A: Apply color correctors sparingly, using a minimal amount and building up if necessary. Blend thoroughly to avoid demarcation lines, and set with a small amount of translucent powder. Additionally, layering thin, buildable layers of corrector and subsequent makeup products helps prevent a heavy appearance.
Q: Can I use color correction for acne-prone skin?
A: Yes, but it’s important to choose non-comedogenic, oil-free correctors and be gentle during application to avoid aggravating existing breakouts. Green correctors can be effective in neutralizing redness associated with acne.
Q: How long does color correction last, and how can I make it last longer?
A: The longevity of color correction depends on factors such as product quality, application technique, and environmental conditions. To make it last longer, start with a well-prepped canvas, use primer, choose long-wearing products, set with powder, and consider weather conditions when applying makeup.
Q: Can color correction be used on mature skin?
A: Yes, color correction can be used on mature skin. Opt for creamy or liquid formulations that won’t settle into fine lines, and choose hydrating products to maintain a natural and youthful appearance.
Q: Is it necessary to color correctly every day?
A: It depends on your individual skin concerns. While not necessary for everyone, color correction can be beneficial for addressing specific issues. Some may choose to incorporate it into their daily routine, while others reserve it for special occasions or when specific concerns arise.
Celebrities have access to the newest and best beauty and skin care products out there. Plus, they work closely with some of the most elite makeup artists and estheticians in the biz to keep their skin looking camera ready. With the multitude of products available to them, it’s a huge compliment when these stars use Eminence Organic Skin Care products and share their enthusiam for them with fans. We’re excited to let you in on some of their favorites!
1. Mark Ruffalo
During the filming of Thor: Ragnarok in Australia, acclaimed actor Mark Ruffalo regularly used the Stone Crop Gel Wash and Stone Crop Whip Moisturizer. Most recently, Mark was working on the set of buzz-worthy film Poor Things with actress Emma Stone. To support his skin care routine, we gifted Mark his tried-and-true Stone Crop Gel Wash and Stone Crop Whip Moisturizer products, as well as the Facial Recovery Oil, Stone Crop Hydrating Mist and Bearberry Eye Repair Cream.
2. Issa Rae
You might know her from Insecure, the television show she created and starred in. Or maybe you saw her embody “President Barbie” in a little summer blockbuster movie you may have heard of. Regardless of where you first discovered Issa Rae, she is now a mega star and Vogue.com agrees. They asked her to share her beauty secrets to help the rest of us mere mortals achieve some of the glow that she emits onscreen, including using the Citrus & Kale Potent C+E Serum. You can watch her talk through her routine on YouTube here.
3. Jeremy Allen White
For his Emmy-nominated role as Carmy Berzatto in The Bear, Jeremy Allen White undergoes some pretty major transformations in the makeup chair. Even his own tattoos are completely concealed, only to be temporarily replaced by his character’s extensive ink. And the work doesn’t stop there. His makeup artist Ignacia Soto-Aguilar tells NewBeauty: “A solid skin care regimen is crucial to minimize scene interruptions [for touch-ups].” And since a lot of his scenes move between the inside of a hot, steamy kitchen and outside in the harsh, dry, cold Chicago winter, it’s important to keep the skin as healthy as possible. Part of the routine for keeping Carmy’s skin glowing is the Hibiscus Ultra Lift Eye Cream. According to Soto-Aguilar, Jeremy loves the results so much that he now follows the same routine at home.
4. Camila Mendes
Perhaps best known for her role as Veronica Lodge in Riverdale, Camila Mendes shared her favorite skin care products with Glamour.com and name-dropped an Eminence best seller!
“The Eminence Organics Stone Crop Hydrating Mist is one of my recent favorites. I like to spray a few spritzes of that on a cotton pad and wipe my face with it after cleansing. Not only does it remove all the extra product residue on my skin, but it also smells incredible.”
And when asked about her desert island products, another Eminence fave, the Clear Skin Probiotic Cleanser, made the cut! What can we say, Camila has good taste (and great skin)!
5. Natalie Morales
Another fan of the Clear Skin Probiotic Cleanser is actress Natalie Morales. With a long list of TV shows under her belt, including Dead To Me, Parks and Recreation, The Newsroom and Trophy Wife, she’s definitely been exposed to her fair share of makeup chairs, beauty experts and the best of the best products. According to her glamour.com Drop The Routine interview, she loves a double (or triple) cleanse and relies on the Clear Skin Probiotic Cleanser to help remove her makeup and give her a satisfying, deep clean.
6. Mark Strong
You may know Mark Strong for his roles in Sherlock Holmes and Kingsman: The Secret Service. While working on a TV series being filmed in Budapest, Mark enjoyed keeping his skin in great condition using the Stone Crop Gel Wash, Birch Water Purifying Essence and Stone Crop Hydrating Mist. In thanks, Mark dedicated his signed headshot to Eminence. He wrote, “Thank you Eminence for the fabulous products and congrats on the 25 million trees planted!”
We can see why these products are celeb faves! Get in touch with your favorite Eminence Organics Spa Partner for a professional consultation to find out which products will get your skin camera ready.